Azure Data Factory
(ADF) does not have a built-in activity to send emails directly (As of Feb
2024). However, you can achieve this functionality by integrating ADF with
other Azure services that can send emails, such as Azure Logic Apps or Azure
Functions. In this article, we will achieve that using Azure Logic Apps.
Step 1: Create an Azure Logic App for Sending Emails
- Go to Azure Portal: Log in to the Azure Portal.
- Create a Logic App: Navigate to “Create
a resource” > “Integration” > “Logic App”.
- Configure the Logic App:
- Choose your
subscription, resource group, and provide a name for the Logic App.
- Select the region and
click “Review + create” and then “Create”.

- Design the Logic App:
- Once the Logic App is
deployed, go to it and open the Logic App Designer.
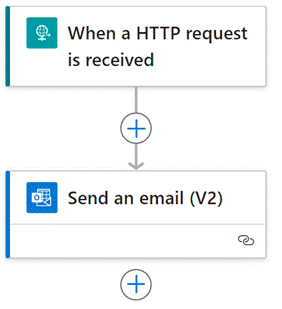
- Choose a trigger for
the Logic App, such as When an HTTP request is received.
- Add an action to send
an email. You can use built-in connectors like Office 365 Outlook, Outlook.com,
or Gmail. For example, with the Office 365 Outlook connector, you can use the
“Send an email (V2)” action.

- Configure the action
with the necessary details like the recipient's email address, subject, and
body. You can dynamically set these fields using the data passed from ADF.
Step 2: Call the Logic App from Azure Data Factory
Step 3: Test and Monitor
- Debug: Use the Debug feature in ADF to test the
pipeline and ensure the Logic App is triggered and the email is sent as
expected.
- Monitor: Check the runs and outcomes in both ADF and
the Logic App for successful execution and to troubleshoot any issues.
Best Practices
- Security: Ensure that any sensitive data passed
from ADF to Logic Apps is handled securely.
- Error
Handling: Implement error
handling in your ADF pipeline to manage failures in triggering the Logic App or
sending the email.
- Logic
App Design: Design your Logic
App to handle various scenarios, including retries or handling attachments if
needed.