Adding a web part to a SharePoint page is a fundamental skill for
customizing and enhancing the functionality of your SharePoint sites. Web parts
are reusable components that provide specific functionality, such as displaying
lists, showing custom content, or integrating other services. Here's how you
can add a web part to a SharePoint page:
Add a Web Part in SharePoint Online modern page
- Navigate to the SharePoint page where
you want to add the web part.
- Click on Edit at the top right of the page. This will switch the page to
edit mode, allowing you to modify its contents.
- Hover your mouse over the area where you
want to add the web part. You'll see a plus (+) button, usually in a circle,
which indicates that you can add a new web part there.
- Click on the plus (+) button to open the
web part picker, which shows a list of available web parts.
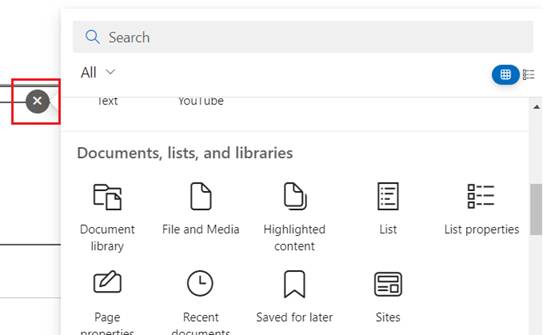
- Browse or search for the web part you
want to add. SharePoint Online offers a variety of web parts, such as Text,
Image, Document Library, Quick Links, Microsoft Forms, and more.
- Click on the desired web part to select
it. The web part will be added to your page at the selected location.
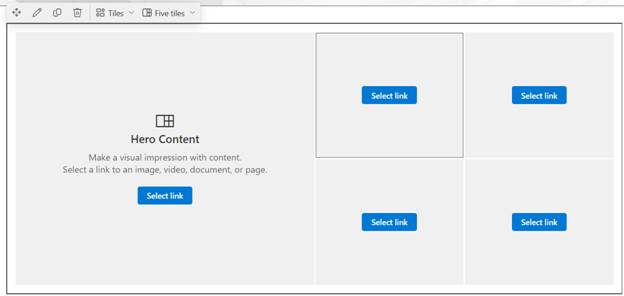
- Once the web part is added, you can
configure it by clicking on any configuration icons or links that appear within
the web part. For example, you might need to specify which list to display in a
List web part or configure settings in a Microsoft Forms web part.
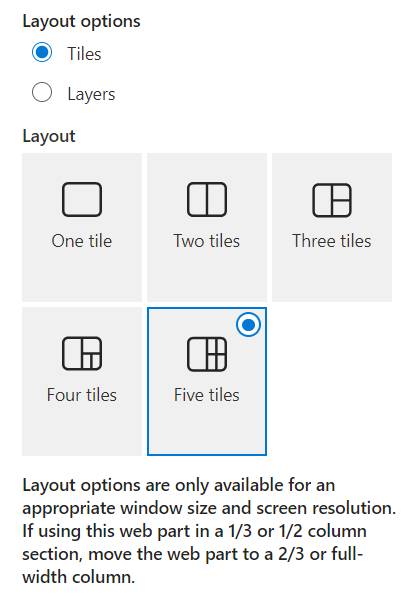
- Use the web part’s properties pane
(usually appears on the right side) to customize settings like layout, content
sources, and appearance.
- You can move the web part by dragging
and dropping it to another part of the page.
- Some web parts allow resizing by
dragging the edges to increase or decrease their size.
- After adding and configuring your web
parts, click Publish at the top
right to make the changes visible to all users. If you're not ready to publish,
you can also click Save as draft to
save your changes without making them public.
Additional Tips
·
Responsive
Design: Ensure that the web parts and their
layout work well on different devices. SharePoint pages are responsive, but the
arrangement of web parts can affect usability on mobile devices.
·
Permissions: Be aware of content and data shown in web parts, as
you might inadvertently expose sensitive information. Check permissions for
content that web parts are displaying.
·
Testing: After publishing, view the page as a regular user to
ensure everything appears and functions as intended.
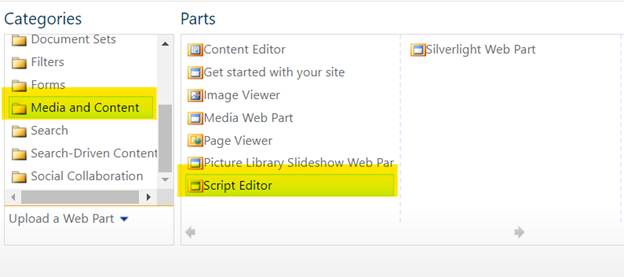
Add a Web Part in SharePoint Online classic page
·
Go to your SharePoint site where you
want the form to appear.
·
Edit the page
where you want to insert the webpart.
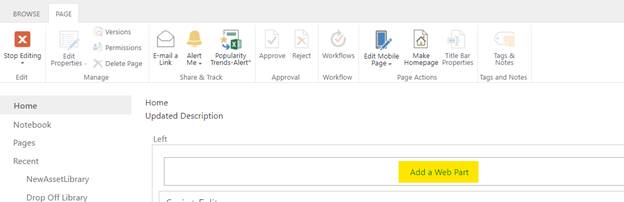
·
Click on Add a Web Part to add a new web part.
·
Choose the webpart that you want from
the list. Select the Script Editor web part (or whatever webpart you want to
add).
·
Paste the link or embed code of your
form.
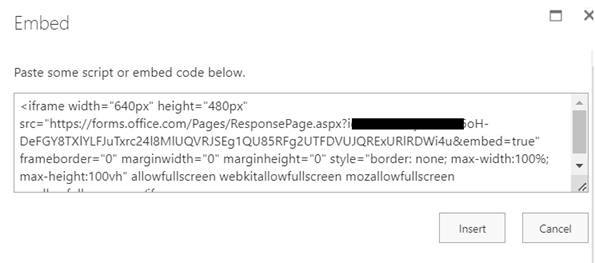
·
Publish or save the page to make the
form visible to users. Here we have loading Microsoft form using iframe script
in the script editor web part.
Adding
web parts is crucial for tailoring SharePoint sites to meet specific business
needs and enhancing user engagement.