Creating
and managing folders in SharePoint Online is a basic aspect of arranging
documents and files within a SharePoint document library. In this article we
will go through a detailed guide on how to work with folders in SharePoint
Online:
How
to Create a folder in SharePoint Online?
- Log in to
your Office 365 account.
- Access the
SharePoint site where you want to organize files.
- Once you
are on the SharePoint site, navigate to the document library where you want to
add a new folder. You can access document libraries from the site contents or
directly from the navigation pane.
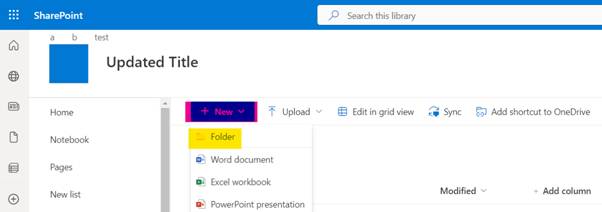
- Inside the document
library, click on New and then
select Folder from the dropdown
menu.
- You will be
prompted to enter a name for your
new folder. Choose a name that clearly represents the contents you plan to
store in it. After typing the name, click Create
or press Enter.
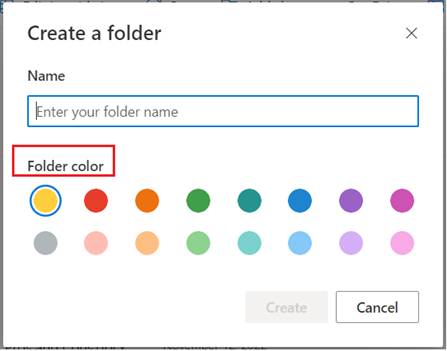
- Your new
folder will now be created and will appear in the document library. You can
also select a colour so that your new folder will be created in that colour,
this will be very useful when you identify the folder just by its colour.
How
to Delete a folder in SharePoint Online?
- Go to the SharePoint site containing the
document library from which you want to delete a folder.
- Navigate to the specific document library
where the folder is located.
- Browse through the library to find the
folder you wish to delete. If you have a lot of folders or files, you can use
the search bar to quickly locate the folder by typing its name.
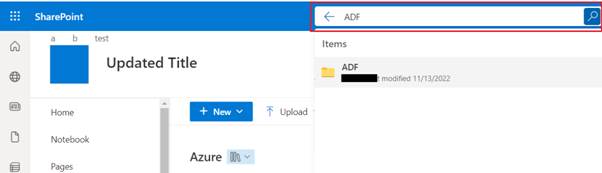
- If you have lots of document libraries
and folders and you don’t remember the library name, you can also start a site
wide search from top right corner from the home page.

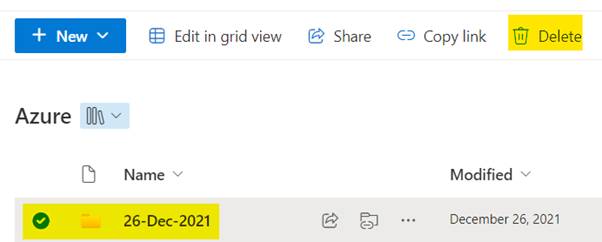
- Hover over the folder to see a checkbox
appear on the left side of the folder name. Click this checkbox to select the
folder.
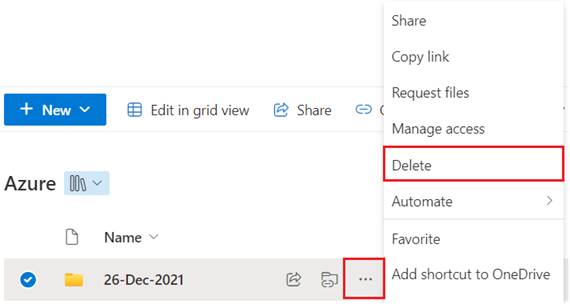
- With the folder selected, click on the Delete option available in the command
bar at the top of the page.
- Alternatively, you can click on the
ellipsis (…) next to the folder name and then select Delete from the drop-down menu.
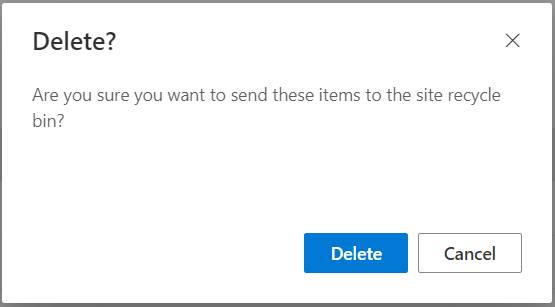
- You will likely receive a prompt asking
for confirmation that you really want to delete the folder and all of its
contents. Confirm the deletion to proceed.
How
to move folders in SharePoint Online?
Navigate
to the document library where the folder currently resides. You can access the
library either through the site contents or from a direct link on the site’s
homepage or navigation pane.Locate
the folder you wish to move. Click on the checkbox next to the folder name to
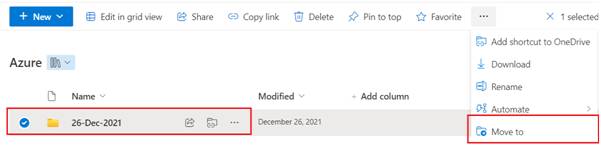
select it.With
the folder selected, click on the Move
to option in the command bar at the top of the page.
 A pane will
appear on the screen, showing you the possible destinations for the move. You
can choose another location within the
same library, a different library,
or even a different site within your
SharePoint environment.
A pane will
appear on the screen, showing you the possible destinations for the move. You
can choose another location within the
same library, a different library,
or even a different site within your
SharePoint environment.
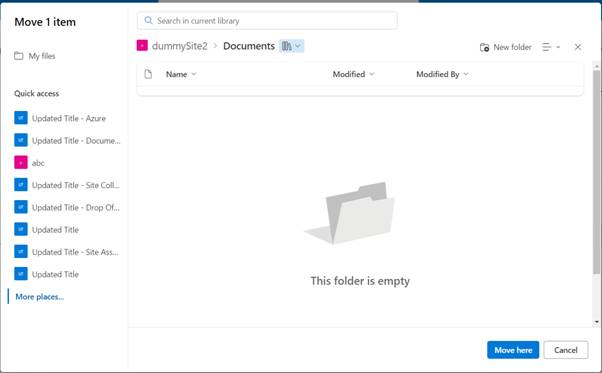 Navigate
through the SharePoint directory in the pane to find the destination where you
want to move the folder.Once you
have located the destination, click Move
here.
Navigate
through the SharePoint directory in the pane to find the destination where you
want to move the folder.Once you
have located the destination, click Move
here.
How
to Create a shared folder?
Creating a shared
folder in SharePoint Online involves setting up a folder within a document
library and then configuring permissions so that specific users or groups can
access it. This process ensures that you can collaborate efficiently by sharing
documents and other files within your organization or with external partners.
If you
already have a document library where you want to create the shared folder, navigate
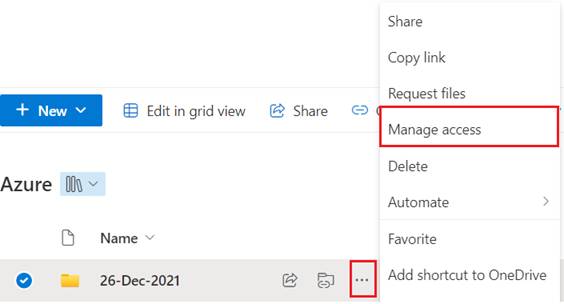
to it.Inside the
document library, click on “New” at the top of the page, then select “Folder”.Enter a name for the folder and click “Create”.Navigate to the folder you just created, click on the ellipsis (…) next to the folder
name, and select “Manage access”.
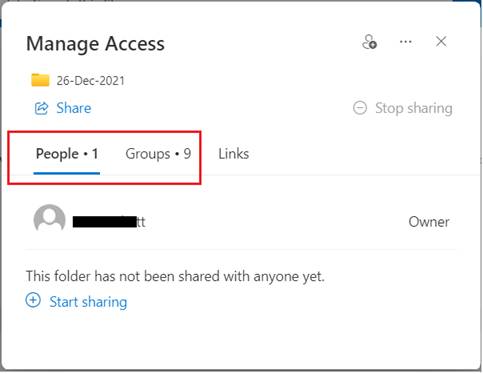
 The Manage access pane will show up. Here you can see who (People and
Groups) currently has access to the folder.
The Manage access pane will show up. Here you can see who (People and
Groups) currently has access to the folder.
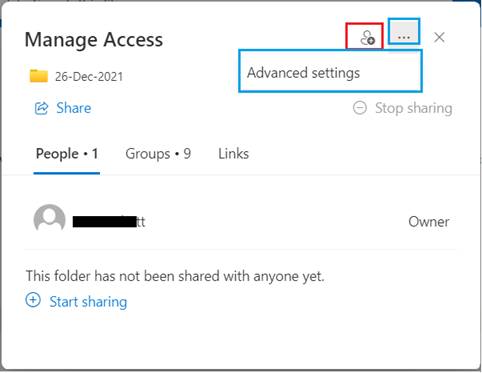
 There are two navigations to
manage this from top right corner of the popup.To change permissions, click
on Advanced Settings to go to the detailed permissions page.You can add or remove
users or groups from here.
There are two navigations to
manage this from top right corner of the popup.To change permissions, click
on Advanced Settings to go to the detailed permissions page.You can add or remove
users or groups from here.
 To add users/groups,
click on Grant permissions.Enter the email addresses of
the users or the names of the groups you want to share the folder with. You can
choose whether they can view or edit the contents.Click Share to apply
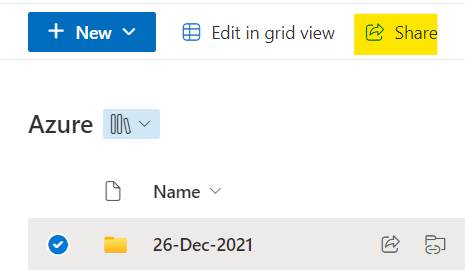
the permissions.For direct sharing, instead
of managing detailed permissions, you can also share the folder directly:Right-click the folder and
select Share.
To add users/groups,
click on Grant permissions.Enter the email addresses of
the users or the names of the groups you want to share the folder with. You can
choose whether they can view or edit the contents.Click Share to apply
the permissions.For direct sharing, instead
of managing detailed permissions, you can also share the folder directly:Right-click the folder and
select Share.
 Enter the names or email
addresses of the people you want to share with.Choose the permission level
(Can edit/Can view).Click Send to share
the folder via an email link.
Enter the names or email
addresses of the people you want to share with.Choose the permission level
(Can edit/Can view).Click Send to share
the folder via an email link.How
to restrict access to a Folder?
Navigate to
the document library that has the folder you want to restrict.Locate the folder
within the document library to which you want to apply restricted access.Right-click
on the folder, or click the ellipsis (…) next to the folder name, then select Manage
access.
In the
Manage access panel, click Advanced
settings to navigate to the detailed permissions page.
 On the
permissions page, you'll see that the folder is likely inheriting permissions
from its parent document library. To change permissions specifically for this
folder, click Stop inheriting permissions.
On the
permissions page, you'll see that the folder is likely inheriting permissions
from its parent document library. To change permissions specifically for this
folder, click Stop inheriting permissions.
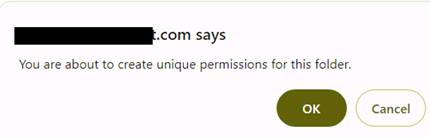
 You will be
prompted to confirm. Click OK to proceed.
You will be
prompted to confirm. Click OK to proceed.
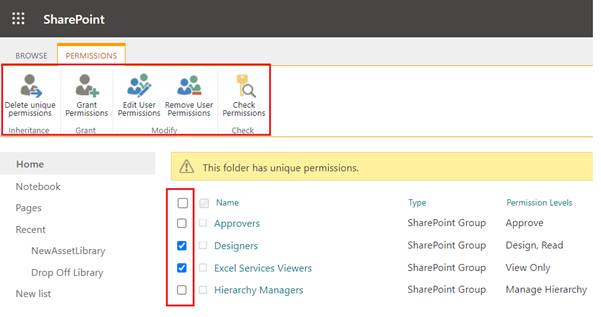
 Once
inheritance is stopped, you can remove groups or individual users who should no
longer have access. Under the Permissions tab, you'll see a list of users and
groups.Click the
checkbox next to the users or groups you want to remove and then click Remove
User Permissions.
Once
inheritance is stopped, you can remove groups or individual users who should no
longer have access. Under the Permissions tab, you'll see a list of users and
groups.Click the
checkbox next to the users or groups you want to remove and then click Remove
User Permissions.
 Confirm
your action if prompted.After
removing undesired permissions, click Grant Permissions to add users or
groups who need access to the folder.Note: If you click
on Grant Permission and you see a
message like this then you need to disable this feature:limited access lockdown mode feature
Confirm
your action if prompted.After
removing undesired permissions, click Grant Permissions to add users or
groups who need access to the folder.Note: If you click
on Grant Permission and you see a
message like this then you need to disable this feature:limited access lockdown mode feature
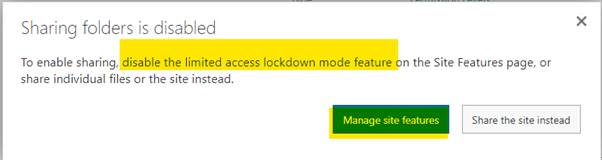 Click on
the manage site feature and you can act according to your requirement.
Click on
the manage site feature and you can act according to your requirement.
 Now, coming
back to the previous step (Once you disable the above feature), enter the email
addresses or group names in the provided box for granting the permission.Choose the permission level (e.g., View Only, Edit) from the drop-down menu. For highly
restricted access, you might want to choose View Only.
Now, coming
back to the previous step (Once you disable the above feature), enter the email
addresses or group names in the provided box for granting the permission.Choose the permission level (e.g., View Only, Edit) from the drop-down menu. For highly
restricted access, you might want to choose View Only.
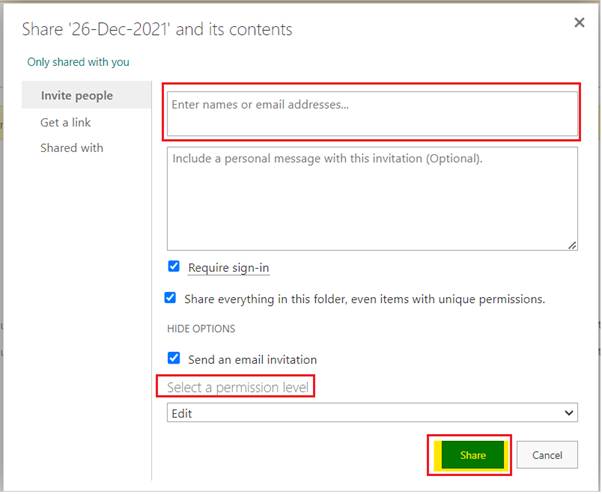 Click Share
to apply the permissions.
Click Share
to apply the permissions.How to
create a Link to SharePoint folder?
Creating a link which redirects to a
SharePoint folder is very easy.