In this article, we are going to learn how
to upload and download files manually as well as programmatically
How
to upload a file in SharePoint Online?
- Navigate to your
SharePoint site: Go to the SharePoint site where you
want to upload the file. You can do this by entering the URL in your web
browser.
- Open the
document library: Once you're on the SharePoint site,
navigate to the document library where you want to upload the file. If you
don't have the document library yet, you may need to create one.
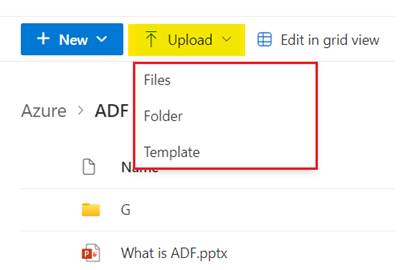
- Click on the
"Upload" button: Look for the
"Upload" button, Click on it to initiate the upload process. You can
choose File, Folder (with multiple files) or Template to upload.
- Select the file/folder: A file explorer window will open. Navigate to the
location of the file you want to upload on your computer, select it, and click Open to begin the upload.
- Wait for the
upload to complete: Depending on the size of the file and
your internet connection speed, it may take some time for the file to upload.
You'll typically see a progress indicator showing the upload status.
- Add metadata
(optional): If the document library has any
mandatory metadata, then after upload it may prompt you to add those metadata
otherwise the upload process is done.
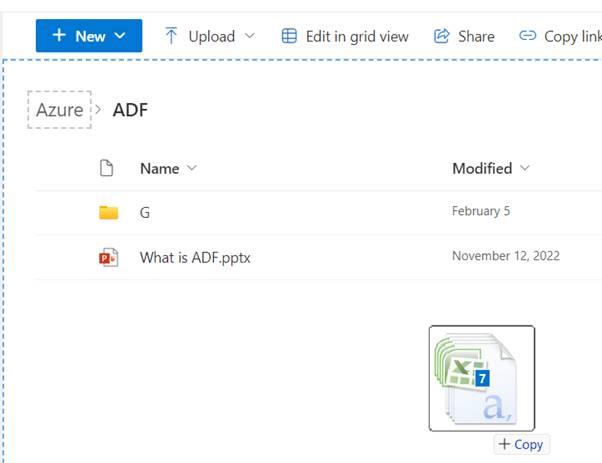
- You can also
drag and drop files in the directory, to upload files and folders.
How
to download a file from SharePoint Online?
- Navigate to the
file: Go to the SharePoint site and find the
document library where the file you want to download is located.
- Locate the file: Browse through the document library or use the search
functionality to find the specific file you want to download.
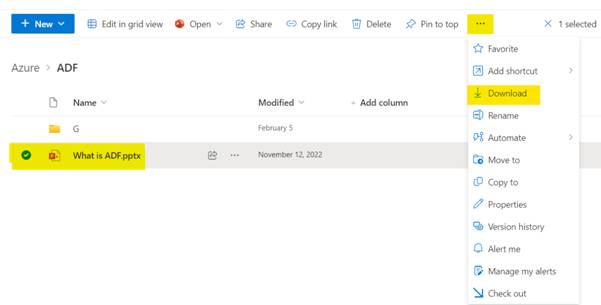
- Select the file: Click on the file name to select it. Now hover over
the file or click on a checkbox next to it.
- Download the
file: Once the file is selected, click on Download button. Click on it to
initiate the download process.
- Choose the
download location: Either your browser will prompt you to
choose location or it will start downloading the file on the default location
set in the browser.
Download
a file from SharePoint online using pnp powershell
To download a file from SharePoint Online using PnP PowerShell, you can
use the Get-PnPFile cmdlet. Here's how you can
do it:
# Connect to SharePoint Online
Connect-PnPOnline -Url "Your
SharePoint Site URL" -Credentials (Get-Credential)
# Specify the file path in SharePoint
$filePath =
"/sites/YourSiteName/YourLibraryName/FileName.docx"
# Specify the local path where you want
to save the downloaded file
$localPath = "C:\Downloads\FileName.docx"
# Download the file
Get-PnPFile -Url $filePath -Path
$localPath
# Disconnect from SharePoint Online
Disconnect-PnPOnline
Make sure to replace Your SharePoint Site URL, YourSiteName, YourLibraryName, and FileName.docx with your actual SharePoint site URL, site name,
library name, and file name, respectively.
When you run this script, it will prompt
you to enter your credentials for SharePoint Online. After providing the
credentials, the specified file will be downloaded to the local path specified
in $localPath.
Ensure you have the
SharePointPnPPowerShellOnline module installed. You can install it using the
following command:
Install-Module -Name
SharePointPnPPowerShellOnline –Force
This will
install the latest version of the SharePointPnPPowerShellOnline module from the
PowerShell Gallery.
Upload
file to SharePoint online using powershell
To upload a file to SharePoint Online using PowerShell, you can use the
SharePoint Online Management Shell or the SharePoint PnP PowerShell module.
Here's how you can do it using the SharePoint PnP PowerShell module:
First, you need to install the
SharePoint PnP PowerShell module if you haven't already. You can do this by
running the following command in PowerShell:
Install-Module
-Name SharePointPnPPowerShellOnline –Force
Once installed, you can use the following PowerShell script to upload a
file to SharePoint Online:
# Connect to
SharePoint Online
Connect-PnPOnline
-Url "https://yourtenant.sharepoint.com/sites/yoursite" -Credentials (Get-Credential)
# Specify the local
path of the file to upload
$localFilePath =
"C:\Path\To\Your\File.docx"
# Specify the
SharePoint Online library where you want to upload the file
$libraryName =
"Documents"
# Upload the file
Add-PnPFile -Path
$localFilePath -Folder $libraryName
# Disconnect from
SharePoint Online
Disconnect-PnPOnline
Replace "https://yourtenant.sharepoint.com/sites/yoursite" with the
URL of your SharePoint Online site, $localFilePath with the local path of the file you want to upload, and $libraryName with the
name of the library where you want to upload the file.